Home Improvement
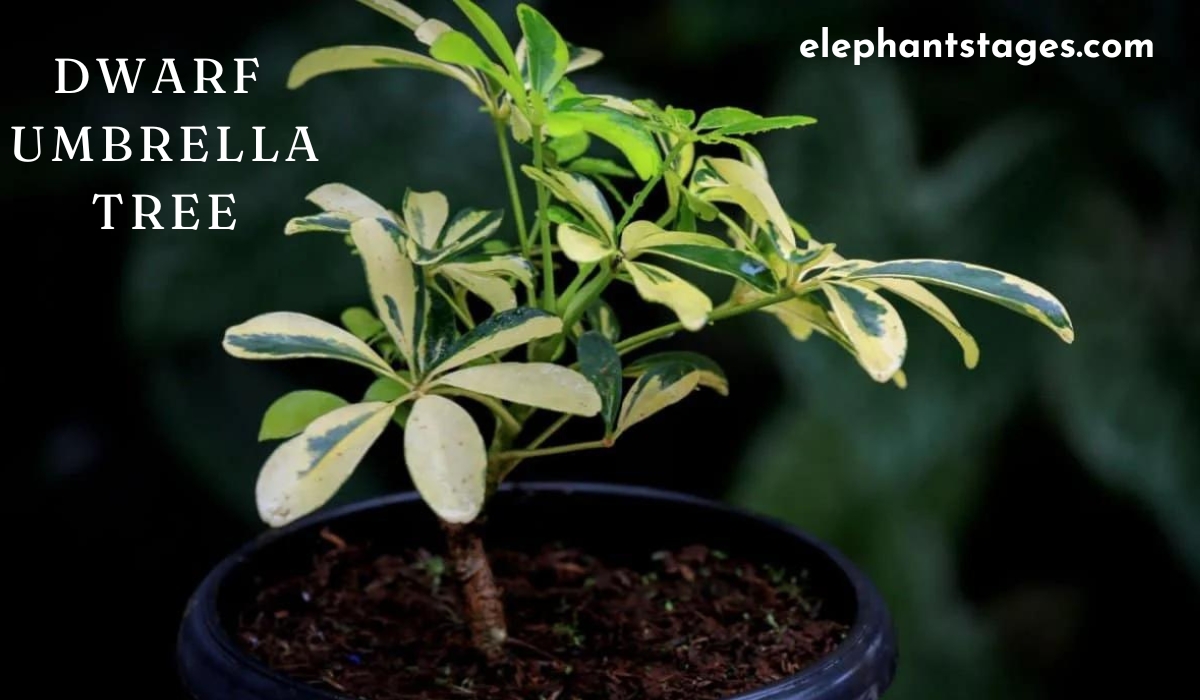
The Ultimate Guide to Growing and Caring for the Dwarf Umbrella Tree (Schefflera arboricola)
Introduction to Schefflera (Umbrella Plant)
Welcome, plant enthusiasts and indoor gardeners! If you’re looking for a low-maintenance, aesthetically pleasing houseplant to enhance your indoor space, look no further than the Schefflera, commonly known as the umbrella plant or the octopus tree. Belonging to the Araliaceae botanical family, this versatile plant is highly popular due to its glossy foliage and easy-to-care-for nature.
Common Names
- Umbrella Plant
- Octopus Tree
- Schefflera
Botanical Family
- Araliaceae
The focus of this guide is on the Dwarf Umbrella Tree, scientifically known as Schefflera arboricola. This plant is a smaller variety of the Schefflera species, characterized by its compact size and stunning, glossy leaves, which can sometimes be variegated. Whether you’re an experienced indoor gardener or a novice looking for your first plant, the Dwarf Umbrella Tree offers a delightful combination of beauty and simplicity.
Varieties of Schefflera
Understanding the varieties of Schefflera can help you choose the right plant for your indoor garden. While there are numerous species, two primary types are often cultivated as houseplants:
1. Schefflera actinophylla
- Description: Known as the larger species, Schefflera actinophylla features long, shiny, oval green leaves that radiate outwards like the spokes of an umbrella.
- Size: Can grow up to 8-10 feet indoors and even taller outdoors in its natural habitat.
- Care: Requires more space and slightly different care compared to its dwarf counterpart.
2. Schefflera arboricola (Dwarf Schefflera)
- Description: A smaller variety with charming, glossy leaves that may sometimes have variegated patterns of cream or yellow.
- Size: Typically reaches heights of 3-6 feet indoors, making it perfect for smaller spaces and container growing.
- Care: Easier to manage in terms of size and space requirements, making it ideal for indoor settings.
Ideal Growing Conditions
To ensure your Dwarf Umbrella Tree thrives, it’s essential to provide the right growing conditions. Here’s a detailed look at the ideal environment for this plant:
Light
- Preferred Light: Bright, indirect light is ideal for the Dwarf Umbrella Tree. Too little light can result in leggy growth, while too much direct sunlight can cause leaf burn.
- Avoid: Direct sunlight, especially during the peak hours of the day.
Soil
- Type: Use rich, well-draining, acidic potting soil. A mix designed for indoor plants with good aeration properties will work best.
- pH Level: Slightly acidic soil pH levels between 6.0 and 6.5 are optimal.
Water
- Frequency: Regular watering is required during the growing season (spring and summer). Allow the soil to dry out between waterings to prevent root rot.
- Method: Water thoroughly until excess water drains from the bottom of the pot. Avoid letting the plant sit in standing water.
Temperature and Humidity
- Temperature: Thrives in warm temperatures above 60°F (15°C). Avoid placing the plant near cold drafts or heating vents.
- Humidity: Prefers high humidity levels, ideally around 40% or higher. Consider using a humidity tray or a room humidifier if your indoor air is dry.
Plant Care and Maintenance
Feeding
- Fertilization Frequency: Fertilize your Dwarf Umbrella Tree twice monthly during the growing season (spring and summer) with a balanced, water-soluble fertilizer.
- Winter Care: Reduce feeding frequency during the fall and winter months when the plant’s growth slows down.
Pruning
- Purpose: Pruning helps maintain the shape and encourages fuller growth of your Dwarf Umbrella Tree.
- How to Prune: Use clean, sharp pruning scissors to trim back overgrown or leggy stems. Remove any dead or yellowing leaves to keep the plant healthy.
Propagation
Propagation is a rewarding way to multiply your Dwarf Umbrella Tree plants. Here are the primary methods:
Stem Cuttings
- Cut a Healthy Stem: Select a healthy stem with several leaves and cut it just below a leaf node.
- Prepare the Cutting: Remove the lower leaves, leaving a few at the top.
- Rooting Medium: Place the cutting in a container filled with moist potting soil or water.
- Root Development: Keep the cutting in a warm, bright location but out of direct sunlight. Roots should develop in a few weeks.
- Transplanting: Once roots have formed, transplant the cutting into a pot with well-draining soil.
Air Layering
- Make an Incision: Make a small, upward cut on a healthy stem and insert a toothpick to keep the cut open.
- Wrap with Moss: Surround the cut area with moist sphagnum moss.
- Cover with Plastic: Wrap the moss with plastic wrap to keep it moist.
- Root Formation: Roots will begin to form around the cut within a few weeks. Once the roots are well-developed, cut the stem below the rooted area and plant it in a pot.
Potential Challenges
Pests and Diseases
The Dwarf Umbrella Tree is relatively resistant to pests and diseases, but it can sometimes encounter problems such as:
- Spider Mites: Tiny pests that create webbing on the leaves. Treat with insecticidal soap or neem oil.
- Scale Insects: Appear as small, brown bumps on the stems and leaves. Remove manually and treat with horticultural oil.
- Root Rot: Caused by overwatering. Ensure proper drainage and avoid letting the plant sit in water.
Toxicity
- To Humans: Mildly toxic if ingested, causing mouth irritation and gastrointestinal discomfort.
- To Pets: More seriously toxic to cats and dogs, causing symptoms such as vomiting, drooling, and difficulty swallowing. Keep out of reach of pets.
Schefflera in Indoor Spaces
In addition to its beauty and low-maintenance nature, the Dwarf Umbrella Tree offers several benefits for your indoor environment:
Air-Purifying Qualities
- Benefit: Schefflera plants are known for their air-purifying properties. They help remove toxins such as benzene, formaldehyde, and toluene from the air, improving indoor air quality.
- Health Impact: Cleaner air can lead to better overall health and well-being for you and your family.
Size and Space
- Adaptability: The Dwarf Umbrella Tree is versatile and can adapt to various indoor spaces. Whether you have a cozy apartment or a spacious home, there’s a Schefflera variety that fits your needs.
- Decoration: Use it as a statement piece in your living room, a natural divider in open spaces, or an elegant addition to your office.
Conclusion
Incorporating a Dwarf Umbrella Tree into your indoor garden is a decision you won’t regret. Its vibrant, glossy foliage, ease of care, and air-purifying qualities make it an ideal choice for both novice and experienced plant enthusiasts. By understanding its growing conditions and maintenance needs, you can enjoy the beauty and benefits of this remarkable plant for years to come.
Ready to add a touch of elegance and freshness to your living space? Start your journey with the Dwarf Umbrella Tree today and experience the joy of indoor gardening like never before.
Thank you for reading, and happy gardening! 🌿
FAQs
1. How often should I water my Dwarf Umbrella Tree?
Water your Dwarf Umbrella Tree regularly during the growing season (spring and summer), allowing the soil to dry out between waterings to prevent root rot.
2. What type of soil is best for a Dwarf Umbrella Tree?
Use rich, well-draining, slightly acidic potting soil with a pH level between 6.0 and 6.5 for optimal growth.
3. How do I propagate my Dwarf Umbrella Tree?
Propagation can be done through stem cuttings or air layering. Both methods involve encouraging root formation before transplanting into potting soil.
4. Can the Dwarf Umbrella Tree grow in low light conditions?
While the Dwarf Umbrella Tree can tolerate low light, it thrives best in bright, indirect sunlight. Too little light can lead to leggy growth.
5. Is the Dwarf Umbrella Tree toxic to pets?
Yes, the plant is toxic to cats and dogs. Ingesting it can cause symptoms like vomiting, drooling, and difficulty swallowing. Keep it out of reach of pets.


Plastic furniture often finds itself at the center of environmental debates. While some view it as an eco-friendly alternative to traditional materials, others label it as harmful. To make informed choices, it’s essential to separate the myths from the facts surrounding the environmental impact of plastic furniture.
In this blog, we’ll explore the truth behind common claims about plastic furniture and highlight its role in sustainable living. Plus, we’ll discuss practical ways to incorporate eco-conscious plastic chairs and tables into your outdoor spaces.
Common Myths About Plastic Furniture
- Myth: Plastic Furniture Is Non-Recyclable
- Fact: Many modern plastic furniture pieces are made from recyclable materials like high-density polyethylene (HDPE). Manufacturers are increasingly adopting recycling programs to minimize waste.
- Myth: Plastic Furniture Is Always Harmful to the Environment
- Fact: Compared to wooden or metal furniture, plastic often requires fewer resources to produce. Eco-friendly options made from recycled materials significantly reduce environmental impact.
- Myth: Plastic Furniture Is Inferior in Quality
- Fact: Advances in technology have made plastic furniture highly durable and weather-resistant, debunking the notion that it’s low-quality.
- Myth: Plastic Furniture Is Unsuitable for Stylish Homes
- Fact: Modern plastic furniture comes in sleek designs and vibrant colors that can elevate the look of any indoor or outdoor space, blending style and practicality effortlessly.
The Facts: How Plastic Furniture Can Be Eco-Friendly
- Recyclable Materials: Many manufacturers now produce plastic furniture using post-consumer recycled materials. This reduces the demand for virgin plastic and promotes a circular economy.
- Longevity: Plastic furniture’s durability ensures a longer lifespan, reducing the frequency of replacements and the overall carbon footprint.
- Energy Efficiency: Producing plastic furniture typically consumes less energy compared to materials like metal or wood, especially when recycled plastics are used.
- Minimal Waste: With proper disposal and recycling initiatives, plastic furniture waste can be significantly minimized, contributing to a cleaner environment.
Italica’s Sustainable Plastic Furniture
For those seeking eco-friendly options, Italica’s plastic chairs and plastic tables are excellent choices. Designed with both style and sustainability in mind, these pieces are perfect for modern spaces.
1. Plastic Chairs
- Italica’s chairs are lightweight, durable, and made from high-quality materials. They’re weather-resistant and come in a range of colors to match any outdoor decor. These chairs are versatile enough to be used in patios, gardens, or even indoor spaces.
- Eco-Friendly Tip: Choose chairs made from recycled plastic to support sustainable practices. Consider models that are stackable for convenient storage and space-saving benefits.
2. Plastic Tables
- Italica’s tables combine functionality with aesthetic appeal. Whether you need a dining table for your patio or a side table for your garden, you’ll find versatile options that are easy to maintain. These tables are designed to withstand harsh weather conditions without compromising on style.
- Eco-Friendly Tip: Pair your table with matching recycled plastic chairs for a cohesive and sustainable setup. Look for tables with smooth surfaces and sturdy legs for maximum durability.
How to Reduce the Environmental Impact of Plastic Furniture
- Choose Recycled Materials: Opt for furniture made from post-consumer or recycled plastics to reduce waste and promote reuse. Italica’s product line offers several options in this category.
- Practice Proper Disposal: When replacing old furniture, recycle or donate it to ensure it doesn’t end up in landfills. Many local recycling centers accept plastic furniture.
- Invest in Quality: High-quality plastic furniture lasts longer, reducing the need for frequent replacements and minimizing waste. Durable options like Italica’s chairs and tables are excellent investments for this purpose.
- Support Sustainable Brands: Purchase from brands like Italica that prioritize eco-conscious manufacturing processes. Their commitment to sustainability ensures that your purchase contributes positively to the environment.
- Repurpose and Upcycle: Extend the life of your plastic furniture by repurposing it for different uses. For example, a worn-out chair can serve as a garden planter, adding charm to your outdoor space while reducing waste.
Debunking More Myths
- Myth: Plastic Furniture Looks Cheap
- Fact: Modern designs feature sleek finishes and vibrant colors, making plastic furniture stylish and elegant. Italica’s collection exemplifies how plastic furniture can enhance the aesthetics of any space.
- Myth: Plastic Furniture Is Hard to Maintain
- Fact: On the contrary, plastic furniture requires minimal maintenance. A simple wipe-down with a damp cloth keeps it clean and ready for use. Its resistance to rust and corrosion makes it ideal for outdoor settings.
- Myth: Plastic Furniture Isn’t Suitable for Outdoor Use
- Fact: High-quality plastic furniture is specifically designed to withstand extreme weather conditions, making it a practical choice for outdoor spaces.
Final Thoughts
Plastic furniture has a significant role to play in sustainable living when chosen and used responsibly. By debunking myths and focusing on the facts, we can appreciate the environmental benefits of this versatile material. Whether you’re furnishing a cozy balcony, a sprawling garden, or an indoor space, plastic furniture offers unmatched durability, affordability, and style.
Eco-conscious choices, like Italica’s plastic chairs and plastic tables, are paving the way for sustainable living. These products demonstrate that functionality and environmental responsibility can coexist beautifully.
With the right approach, plastic furniture can be a practical and environmentally conscious addition to your home. Let’s embrace the possibilities and make choices that benefit both our spaces and the planet. Choose Italica for furniture that embodies sustainability and style, proving that eco-friendly living can be both practical and elegant.

Rodent infestations in Central Texas homes are more common than many realize. Mice and rats can slip through tiny openings, seeking food and shelter. I know dealing with these unwelcome guests can be stressful, but it’s essential to tackle the problem efficiently. First, understand that quick action is necessary. Rodents not only damage your home, but they also carry diseases. I recommend three initial steps to address these intruders. Begin by identifying entry points. Look for holes around doors, windows, and foundations. Second, set traps in active areas. Traps help reduce the rodent population swiftly. Third, ensure food is stored in sealed containers. This reduces their food supply, making your home less appealing. If the problem persists, consider contacting professionals like Stride Pest Control. They have experience handling infestations safely. Remember, a proactive approach can save you from bigger issues in the future.
Understanding the Nature of Rodents
Rodents are adaptable creatures. They enter homes through gaps as small as a dime for mice and a quarter for rats. These pests are nocturnal and often go unnoticed until the problem escalates. They reproduce quickly, making early detection crucial. Rodents chew on wires, wood, and insulation, leading to potential fire hazards and structural damage. Moreover, they spread diseases like hantavirus and salmonella, posing health risks to your family and pets. The Centers for Disease Control and Prevention provides detailed information on the diseases rodents carry, which you can find here.
Initial Steps to Tackle Rodent Infestations
As mentioned, the first step is identifying entry points. Inspect the exterior of your home thoroughly. Seal any gaps with steel wool or caulk. Pay attention to attic vents and chimney openings. Next, place traps in places where rodent activity is evident. Common areas include behind appliances and along walls. Opt for snap traps over glue traps as they are more humane and effective. Finally, practice good sanitation to remove food sources. Secure trash bins with tight-fitting lids and clean up spills promptly.
Preventive Measures
Prevention is the best defense against rodent infestations. Here are three key measures you can take:
- Regular Inspections: Conduct monthly checks for new entry points and signs of rodent activity.
- Landscaping: Trim trees and shrubs at least three feet from your home to reduce rodent pathways.
- Food Storage: Store pet food, birdseed, and dry goods in metal or glass containers.
Professional Pest Control
When the infestation is beyond control, seeking professional help is wise. Pest control experts have the tools and knowledge to manage infestations effectively. They use methods that are safe for your family and pets. Consider contacting pest control services with a good reputation in your area. For those in Central Texas, Stride Pest Control offers reliable services tailored to your needs.
Comparison of DIY and Professional Rodent Control
| Aspect | DIY Control | Professional Control |
| Cost | Low initial cost | Higher upfront cost |
| Effectiveness | Varies, often less effective | Highly effective |
| Safety | Risk of improper use | Safe and regulated methods |
| Time | Time-consuming | Quick results |
Resources for Further Information
For more detailed guidance on rodent control, the U.S. Environmental Protection Agency provides a comprehensive resource on managing pests in your home, available here. Taking proactive measures not only protects your home but also ensures the safety and health of your family. By understanding rodent behavior and following these steps, you can effectively handle and prevent infestations.
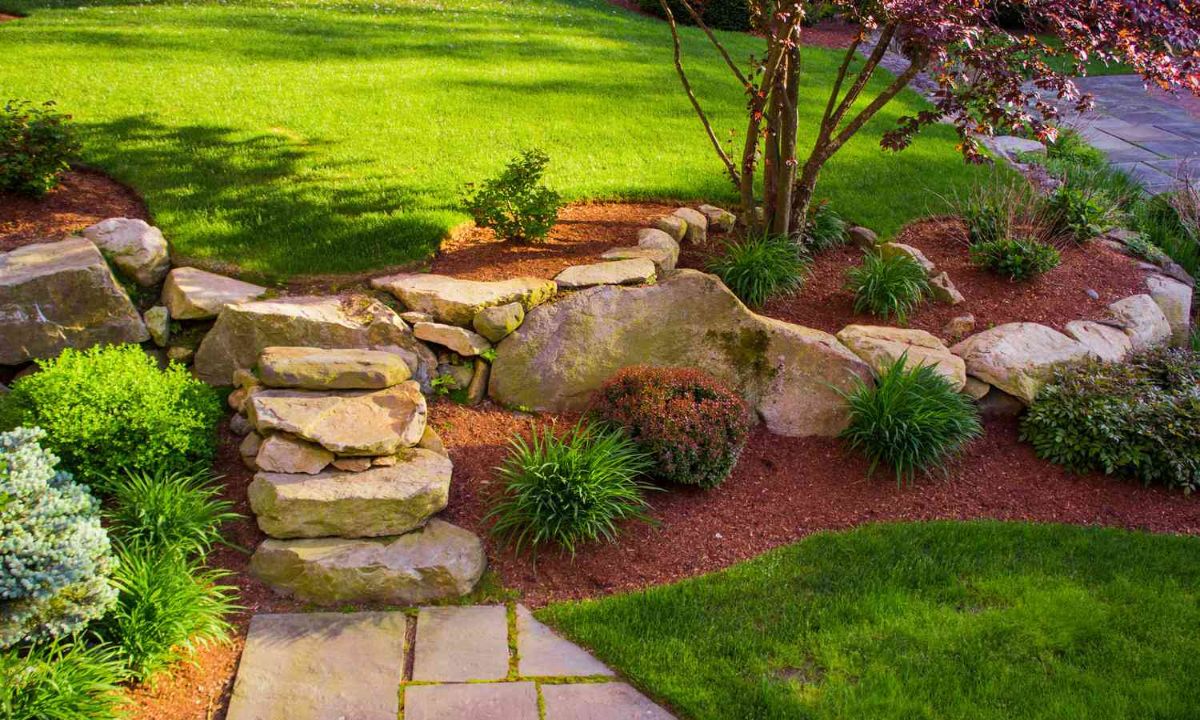
All dream of a beautiful yard that will add value to the homes and become an oasis in which you can relax outdoors. Landscaping will feel like an expensive project. With plants, equipment, and a helping hand from the pros, it can soon become expensive. By using a little creativity and thinking outside the box, it is doable to landscape on a budget. That is why this article gives you a list of ideas or tips for making the exterior of your house going to be comfortable and beautiful without having to spend a lot.
Plan Before You Start
When designing landscapes, planning is the first process. Sort out your yard and figure it onto a paper as well as which landscape design locations you would like design. A well-defined idea of what you want to achieve will prevent you from making purchases that are useless and keep your efforts focused. Take measurements of the space you are working with and create a materials or plant list this plan will be used as your roadmap during the process.
Use What You Have
Take note of what you have before purchasing new plants or materials. Incorporate existing trees, shrubs, or rocks into your landscaping Melbourne design. You can save a lot of money by re-using old bricks or stones to make garden borders, ads, or walkways. You may also upcycle items such as old tubs, barrels, or even tires to make original planters for flowers and vegetables.
DIY Landscaping Projects
Employing a professional landscaper also can be quite expensive, but there are many projects that you could do yourself. You can build a garden bed, lay down a simple stone path, or plant a tree with only some basic tools and time. If you are unsure where to start in the realm of gardening but want to attempt your hand at horticulture at a later time, it usually is advisable to participate in DIY style and design. DIY not only saves money but allows you to customize your yard.
Use Gravel for Pathways
Gravel is an inexpensive way to add pathways to your yard. It is far cheaper than stone or concrete and simple to lay. The gravel path offers smooth scalloped edges and deep texture, a shaded route through the landscape. You could even stone or brick out the paths to make them look neat.
Build a Simple Deck or Patio
You can landscaping Melbourne with a simple deck or patio can be a good area for outdoor dining or relaxation. Expensive materials, such as concrete pavers or even salvaged wood are not required. Because it does not have to be completed all in one go, this DIY project allows you to save up for the materials over time and will leave you with a space that is effective and great looking.
Install Solar Lighting
Outdoor lighting does not have to be overpriced. If you have a yard and want to see your way somehow, solar lights are the best value-for-money lighting you can use that also helps reduce waste. Solar lights are available in many retail outlets, some of which do not even have to be wired up at all. Line your pathways with them or set them around flower beds and patios to add a warm glow in the evening.
Vertical Gardens Add Height
Ideal for those working with limited space or hoping to get creative with how they present their plants. Plant climbing plants like vines, beans, or cucumbers for use with a trellis, fence, or wall. Living walls and vertical gardens are an inexpensive way to get a burst of green without losing the floor space. Additionally, they add more depth and color to your yard.
Gardening on a Budget doesn’t mean that satisfying with the less attractiveness and style. Budget-friendly ideas will create a beautiful and relaxing outdoor space that you can enjoy for years.
-

 Home Improvement6 months ago
Essential Drain Cleaning Tips for Brampton Residents
-
Fashion11 months ago
Attractive Beach Dresses: Elevate Your Look with These Ideas
-
Entertainment10 months ago
Netnaija: Your One-Stop Shop for Free Movies in Africa
-
Pets10 months ago
Pawsitively Perfect: The Types of Dog Harness Bundle for Your Furry Friend
-
News10 months ago
What Are the Biggest Challenges in Marine Construction Projects in Australia?
-
Health11 months ago
Understanding Ftmç: Gender-Affirming Surgery
-
Business11 months ago
How Professional Concrete Cleaning Wins Repeat Business
-
Entertainment12 months ago
Unlocking Cinematic Pleasures: A Comprehensive Look at Rebahin, the Free Movie Streaming Haven