
Home Improvement
The Ultimate Guide to Growing and Caring for the Dwarf Umbrella Tree (Schefflera arboricola)

Introduction to Schefflera (Umbrella Plant)
Welcome, plant enthusiasts and indoor gardeners! If you’re looking for a low-maintenance, aesthetically pleasing houseplant to enhance your indoor space, look no further than the Schefflera, commonly known as the umbrella plant or the octopus tree. Belonging to the Araliaceae botanical family, this versatile plant is highly popular due to its glossy foliage and easy-to-care-for nature.
Common Names
- Umbrella Plant
- Octopus Tree
- Schefflera
Botanical Family
- Araliaceae
The focus of this guide is on the Dwarf Umbrella Tree, scientifically known as Schefflera arboricola. This plant is a smaller variety of the Schefflera species, characterized by its compact size and stunning, glossy leaves, which can sometimes be variegated. Whether you’re an experienced indoor gardener or a novice looking for your first plant, the Dwarf Umbrella Tree offers a delightful combination of beauty and simplicity.
Varieties of Schefflera
Understanding the varieties of Schefflera can help you choose the right plant for your indoor garden. While there are numerous species, two primary types are often cultivated as houseplants:
1. Schefflera actinophylla
- Description: Known as the larger species, Schefflera actinophylla features long, shiny, oval green leaves that radiate outwards like the spokes of an umbrella.
- Size: Can grow up to 8-10 feet indoors and even taller outdoors in its natural habitat.
- Care: Requires more space and slightly different care compared to its dwarf counterpart.
2. Schefflera arboricola (Dwarf Schefflera)
- Description: A smaller variety with charming, glossy leaves that may sometimes have variegated patterns of cream or yellow.
- Size: Typically reaches heights of 3-6 feet indoors, making it perfect for smaller spaces and container growing.
- Care: Easier to manage in terms of size and space requirements, making it ideal for indoor settings.
Ideal Growing Conditions
To ensure your Dwarf Umbrella Tree thrives, it’s essential to provide the right growing conditions. Here’s a detailed look at the ideal environment for this plant:
Light
- Preferred Light: Bright, indirect light is ideal for the Dwarf Umbrella Tree. Too little light can result in leggy growth, while too much direct sunlight can cause leaf burn.
- Avoid: Direct sunlight, especially during the peak hours of the day.
Soil
- Type: Use rich, well-draining, acidic potting soil. A mix designed for indoor plants with good aeration properties will work best.
- pH Level: Slightly acidic soil pH levels between 6.0 and 6.5 are optimal.
Water
- Frequency: Regular watering is required during the growing season (spring and summer). Allow the soil to dry out between waterings to prevent root rot.
- Method: Water thoroughly until excess water drains from the bottom of the pot. Avoid letting the plant sit in standing water.
Temperature and Humidity
- Temperature: Thrives in warm temperatures above 60°F (15°C). Avoid placing the plant near cold drafts or heating vents.
- Humidity: Prefers high humidity levels, ideally around 40% or higher. Consider using a humidity tray or a room humidifier if your indoor air is dry.
Plant Care and Maintenance
Feeding
- Fertilization Frequency: Fertilize your Dwarf Umbrella Tree twice monthly during the growing season (spring and summer) with a balanced, water-soluble fertilizer.
- Winter Care: Reduce feeding frequency during the fall and winter months when the plant’s growth slows down.
Pruning
- Purpose: Pruning helps maintain the shape and encourages fuller growth of your Dwarf Umbrella Tree.
- How to Prune: Use clean, sharp pruning scissors to trim back overgrown or leggy stems. Remove any dead or yellowing leaves to keep the plant healthy.
Propagation
Propagation is a rewarding way to multiply your Dwarf Umbrella Tree plants. Here are the primary methods:
Stem Cuttings
- Cut a Healthy Stem: Select a healthy stem with several leaves and cut it just below a leaf node.
- Prepare the Cutting: Remove the lower leaves, leaving a few at the top.
- Rooting Medium: Place the cutting in a container filled with moist potting soil or water.
- Root Development: Keep the cutting in a warm, bright location but out of direct sunlight. Roots should develop in a few weeks.
- Transplanting: Once roots have formed, transplant the cutting into a pot with well-draining soil.
Air Layering
- Make an Incision: Make a small, upward cut on a healthy stem and insert a toothpick to keep the cut open.
- Wrap with Moss: Surround the cut area with moist sphagnum moss.
- Cover with Plastic: Wrap the moss with plastic wrap to keep it moist.
- Root Formation: Roots will begin to form around the cut within a few weeks. Once the roots are well-developed, cut the stem below the rooted area and plant it in a pot.
Potential Challenges
Pests and Diseases
The Dwarf Umbrella Tree is relatively resistant to pests and diseases, but it can sometimes encounter problems such as:
- Spider Mites: Tiny pests that create webbing on the leaves. Treat with insecticidal soap or neem oil.
- Scale Insects: Appear as small, brown bumps on the stems and leaves. Remove manually and treat with horticultural oil.
- Root Rot: Caused by overwatering. Ensure proper drainage and avoid letting the plant sit in water.
Toxicity
- To Humans: Mildly toxic if ingested, causing mouth irritation and gastrointestinal discomfort.
- To Pets: More seriously toxic to cats and dogs, causing symptoms such as vomiting, drooling, and difficulty swallowing. Keep out of reach of pets.
Schefflera in Indoor Spaces
In addition to its beauty and low-maintenance nature, the Dwarf Umbrella Tree offers several benefits for your indoor environment:
Air-Purifying Qualities
- Benefit: Schefflera plants are known for their air-purifying properties. They help remove toxins such as benzene, formaldehyde, and toluene from the air, improving indoor air quality.
- Health Impact: Cleaner air can lead to better overall health and well-being for you and your family.
Size and Space
- Adaptability: The Dwarf Umbrella Tree is versatile and can adapt to various indoor spaces. Whether you have a cozy apartment or a spacious home, there’s a Schefflera variety that fits your needs.
- Decoration: Use it as a statement piece in your living room, a natural divider in open spaces, or an elegant addition to your office.
Conclusion
Incorporating a Dwarf Umbrella Tree into your indoor garden is a decision you won’t regret. Its vibrant, glossy foliage, ease of care, and air-purifying qualities make it an ideal choice for both novice and experienced plant enthusiasts. By understanding its growing conditions and maintenance needs, you can enjoy the beauty and benefits of this remarkable plant for years to come.
Ready to add a touch of elegance and freshness to your living space? Start your journey with the Dwarf Umbrella Tree today and experience the joy of indoor gardening like never before.
Thank you for reading, and happy gardening! 🌿
FAQs
1. How often should I water my Dwarf Umbrella Tree?
Water your Dwarf Umbrella Tree regularly during the growing season (spring and summer), allowing the soil to dry out between waterings to prevent root rot.
2. What type of soil is best for a Dwarf Umbrella Tree?
Use rich, well-draining, slightly acidic potting soil with a pH level between 6.0 and 6.5 for optimal growth.
3. How do I propagate my Dwarf Umbrella Tree?
Propagation can be done through stem cuttings or air layering. Both methods involve encouraging root formation before transplanting into potting soil.
4. Can the Dwarf Umbrella Tree grow in low light conditions?
While the Dwarf Umbrella Tree can tolerate low light, it thrives best in bright, indirect sunlight. Too little light can lead to leggy growth.
5. Is the Dwarf Umbrella Tree toxic to pets?
Yes, the plant is toxic to cats and dogs. Ingesting it can cause symptoms like vomiting, drooling, and difficulty swallowing. Keep it out of reach of pets.


In recent years, the LED Mirror World has revolutionized the way we enhance our living spaces. With a perfect blend of technology and design, LED mirrors have become a staple in modern homes and businesses. In this article, we’ll explore the myriad benefits of LED mirrors and how they can transform any room into a stylish, functional haven.
The Evolution of LED Mirrors
The journey of LED mirrors from a novelty item to a household essential is fascinating. Originally, mirrors served a simple purpose: reflection. However, with the advent of LED technology, mirrors have evolved to offer much more than just a reflection. The LED Mirror World has introduced mirrors that not only provide exceptional lighting but also enhance the aesthetic appeal of any space.
Benefits of LED Mirrors
- Enhanced Lighting: One of the most significant advantages of LED mirrors is their superior lighting quality. Unlike traditional mirrors, LED mirrors come with built-in lighting that provides consistent, even illumination. This is particularly beneficial for tasks that require precision, such as applying makeup or shaving. The LED Mirror World offers a variety of lighting options, from warm to cool tones, allowing users to customize their lighting experience.
- Energy Efficiency: LED technology is known for its energy efficiency. LED mirrors consume significantly less power compared to traditional lighting solutions, making them an eco-friendly choice. By incorporating LED mirrors into your home or office, you can reduce your energy consumption and contribute to a greener planet.
- Stylish Design: LED mirrors come in a wide range of designs, shapes, and sizes, catering to different tastes and preferences. Whether you prefer a minimalist design or a more ornate look, the LED Mirror World has something for everyone. These mirrors can effortlessly blend into any decor, adding a touch of sophistication and elegance.
- Functional Features: Modern LED mirrors often come equipped with additional features such as touch sensors, anti-fog technology, and Bluetooth speakers. These functionalities enhance the user experience, making daily routines more convenient and enjoyable. Imagine stepping out of the shower to a clear, fog-free mirror or enjoying your favorite tunes while getting ready for the day.
Applications of LED Mirrors
The versatility of LED mirrors makes them suitable for various applications. Here are a few popular uses:
- Bathrooms: LED mirrors are a popular choice for bathrooms, providing ample lighting for grooming and personal care tasks. The LED Mirror World offers mirrors with built-in demisters, ensuring a clear reflection even after a hot shower.
- Bedrooms: In bedrooms, LED mirrors serve as both a practical and decorative element. They can be used as vanity mirrors, adding a touch of glamor to your dressing area.
- Living Rooms: For living rooms, large LED mirrors can create an illusion of space and enhance the overall ambiance. They can act as statement pieces, elevating the room’s design.
- Commercial Spaces: In commercial settings such as salons, hotels, and retail stores, LED mirrors provide functional lighting while enhancing the customer experience. The sleek and modern design of LED mirrors can leave a lasting impression on clients and customers.
Conclusion
The LED Mirror World is continuously evolving, bringing innovative solutions that combine functionality with style. Whether you’re looking to upgrade your home decor or improve the lighting in a commercial space, LED mirrors offer a myriad of benefits. With their energy efficiency, stylish design, and additional features, LED mirrors are a worthwhile investment that can transform any room into a bright, beautiful space. Embrace the LED Mirror World and illuminate your space like never before.
Venturing into the realm of hardware products is like opening a treasure chest of opportunities for the hobbyist and the professional alike. This broad category is very diverse and encompasses a wide range of products from simple practical ones to luxurious decorative ones. In this article, we explore the various options available in the market for cabinet hardware and how these simple objects can make a difference.
Innovation in Design
The innovation that has been introduced in the market by cabinet hardware manufacturers has greatly influenced the way space is used and its appearance. These manufacturers are always innovating in design and produce furniture that is not only functional but also ornamental. From sleek contemporary handles to elaborate antique knobs, the possibilities are endless so people can put their creativity into their kitchens, bathrooms and furniture.
Role in Home Aesthetics
Cabinet hardware is a rather unnoticeable element, but it is rather important when it comes to the overall interior design of a house. Cabinet hardware manufacturers are aware of this effect and provide many designs to fit any décor theme. It does not matter if you are going for a modern style or a country style, the right hardware will complete the interior design perfectly.
Durability and Quality
Reliability is one of the key aspects of products that are produced by leading manufacturers of cabinet hardware. These pieces are made to be used often and still retain their looks so that the investments made in the hardware are long-term. Materials like solid brass, stainless steel and other durable plastics are often used to ensure the strength and durability of the product.
Environmental Impact
With the increasing focus on sustainability, the manufacturer of hardware products is making efforts to minimize the effects of its production on the environment. Some of the cabinet hardware manufacturers are now using recycled materials and are also using manufacturing methods that are not so detrimental to the environment. This commitment not only satisfies the green consumer but also helps the industry to evolve and become greener.
Cutting-Edge Trends
Staying updated with the current trends is very important for any designer or homeowner who wants to redesign their home. Cabinet hardware producers are the first to bring new designs that are in vogue today such as the matte black, sleek and slim lines, and built-in technology. These trends not only improve the functionality of hardware but also its aesthetics, which makes it an essential component of contemporary interior design.
In conclusion, the world of hardware products is vast and ever-evolving, with cabinet hardware manufacturers providing a plethora of choices that can completely transform the utility and appeal of any area. This way, designers and homeowners can select the right products that will allow them to have a unique and beautiful environment that meets their needs. When you are designing a room or constructing a home from the ground up, do not underestimate the importance of the finer points.
YOU MAY ALSO LIKE: Patio Power-Up: Refresh Your Outdoor Space with Pressure Washing
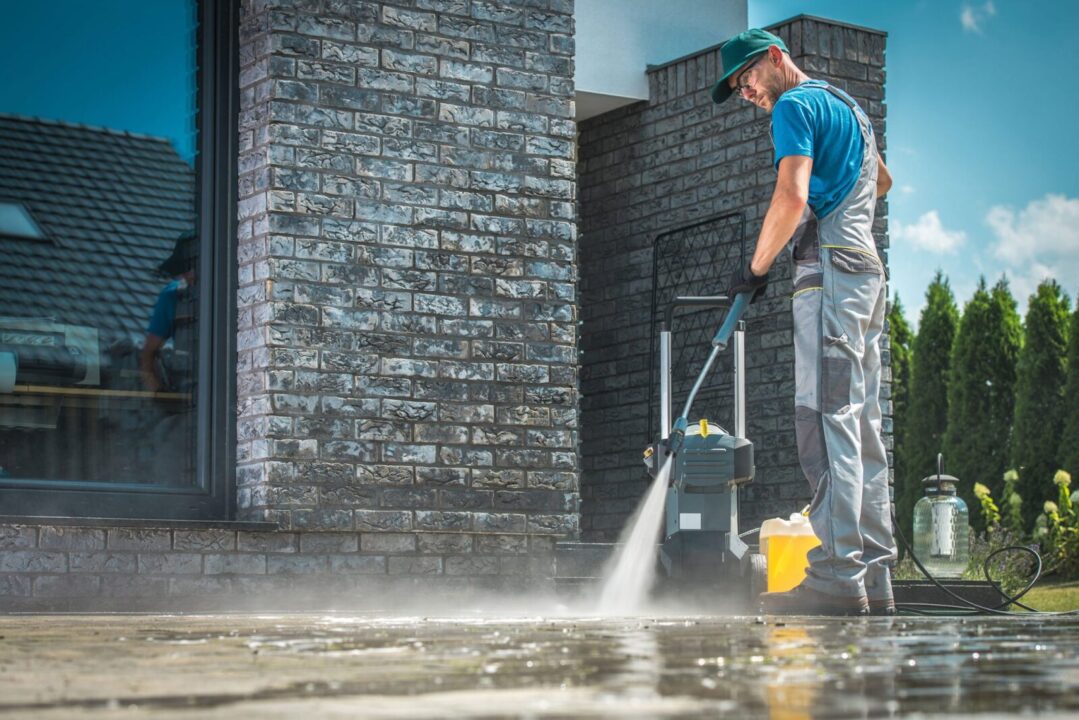
Is your once-glistening patio looking a little worse for wear? Winter’s icy grip left behind a layer of grime, or perhaps those summer barbecues have taken their toll. Fear not, fellow patio owner! Breathe new life into your outdoor space with the magic of pressure washing.
This powerful tool can be your secret weapon against dirt, mold, and grime, transforming your patio from a neglected corner into a sparkling oasis ready for entertaining. But before you unleash the cleaning power, let’s navigate the world of pressure washing and ensure you tackle the job safely and effectively.
Why Pressure Wash Your Patio?
Think of pressure washing as a spa treatment for your patio. Here are some reasons why it might be the perfect pick-me-up for your outdoor space:
Reclaim Your Patio Paradise
Over time, patios accumulate layers of dirt, mold, mildew, and algae. These unwelcome guests not only make your patio look dull but can also create a slippery hazard zone. Pressure washing blasts them away, revealing the original beauty of your concrete, stone, brick, or even wood patio.
Safety First
Slippery moss and algae are like tiny, green landmines waiting to spring a surprise on unsuspecting guests. Pressure washing removes these dangers, creating a safer space for you, your family, and your friends to enjoy.
Get Ready to Party!
Is your patio ready for summer entertaining? Pressure washing removes accumulated dirt, food spills, and grime, making your patio more inviting for barbecues, pool parties, or simply relaxing evenings under the stars.
Increase Curb Appeal
A clean and well-maintained patio can significantly enhance the curb appeal of your entire property. Think of it as putting your best foot forward – or in this case, your best patio forward!
Getting Ready for Patio Power Washing: Safety First!
Before you unleash the cleaning power, let’s make sure you’re prepped and safe. Here are some important measures to follow:
- Gear Up for Battle: Dress for the occasion! Goggles, gloves, sturdy shoes, and long pants are your essential pressure washing armor. Protecting your eyes from flying debris is crucial, and gloves will shield your hands from the cleaning solution and the pressure of the water spray.
- Inspect Your Arsenal: Don’t underestimate the importance of a pre-battle inspection! Check your pressure washer and hose for any leaks or damage. A surprise leak in the middle of cleaning is not the kind of adventure you want.
- Secure the Area: Think of your patio furniture, decorations, and precious plants as innocent bystanders in this cleaning war. Move them out of harm’s way, or cover them with drop cloths to protect them from the water spray.
- Master the Trigger: Hold the trigger at a safe distance and avoid spraying electrical components. Remember, power comes with responsibility – the responsibility to avoid electrical hazards! Consult your pressure washer’s manual for proper operating instructions.
Choosing the Right Tools and Supplies: Assemble Your Cleaning Crew!
Now it’s time to gather your cleaning crew, the essential tools and supplies you’ll need to tackle the job:
Gas vs. Electric?
Pressure washers come in two types: gas-powered and electric. Gas-powered ones are powerhouses, ideal for large or heavily soiled patios. However, they can be heavier and noisier to operate. Electric pressure washers are quieter and easier to maneuver, making them a good choice for smaller patios or for those who prioritize noise control. Consider the size of your patio, your comfort level, and your budget when making your decision.
Nozzle Know-How
Different nozzles create different spray patterns. A wide spray is great for covering large areas quickly, while a narrow one tackles stubborn stains or reaches into tight corners. Having a variety of nozzles on hand allows you to adjust your cleaning approach based on the task at hand.
Power Up Your Clean
For stubborn grime or heavily stained patios, consider using a power-boosting detergent specifically formulated for pressure washing. These detergents can help break down tough dirt and grime, making cleaning more efficient. Important Note: Always choose a detergent that’s safe for your specific patio material (concrete, stone, brick, etc.)
Accessories for Success:
Extension wands are lifesavers for reaching high areas on multi-story patios or cleaning gutters. Drop cloths, as mentioned earlier, become your shields against accidental overspray on surrounding surfaces. Don’t forget to choose a power washer hose with the right length and pressure rating for your machine. A mismatch can lead to leaks or reduced cleaning power.
Prepping Your Patio for Cleaning: Getting Stage Ready

Now that you’ve assembled your cleaning crew and prepped for safety, it’s time to get your patio ready for its close-up (or in this case, its power-washing close-up). Here’s how:
- Clear the Zone: Remove furniture, decorations, and any potted plants that might get caught in the cleaning crossfire. Remember, even the most well-behaved pressure washer can unleash a surprising amount of water.
- Test It Out: Find a hidden spot on your patio, preferably a corner or a small section along the edge. Do a test run with the pressure washer on this inconspicuous area. This helps you check the cleaning power and spray pattern of your chosen nozzle before tackling the entire patio. Adjust the pressure or nozzle if needed to achieve the desired results.
- Dampen Up (Optional): For some materials like concrete, dampening the surface before power washing can make cleaning more efficient. Think of it like softening the dirt before scrubbing. However, dampening isn’t always necessary, especially for materials like stone or brick. Consult your pressure washer manual or research online to see if dampening is recommended for your specific patio material.
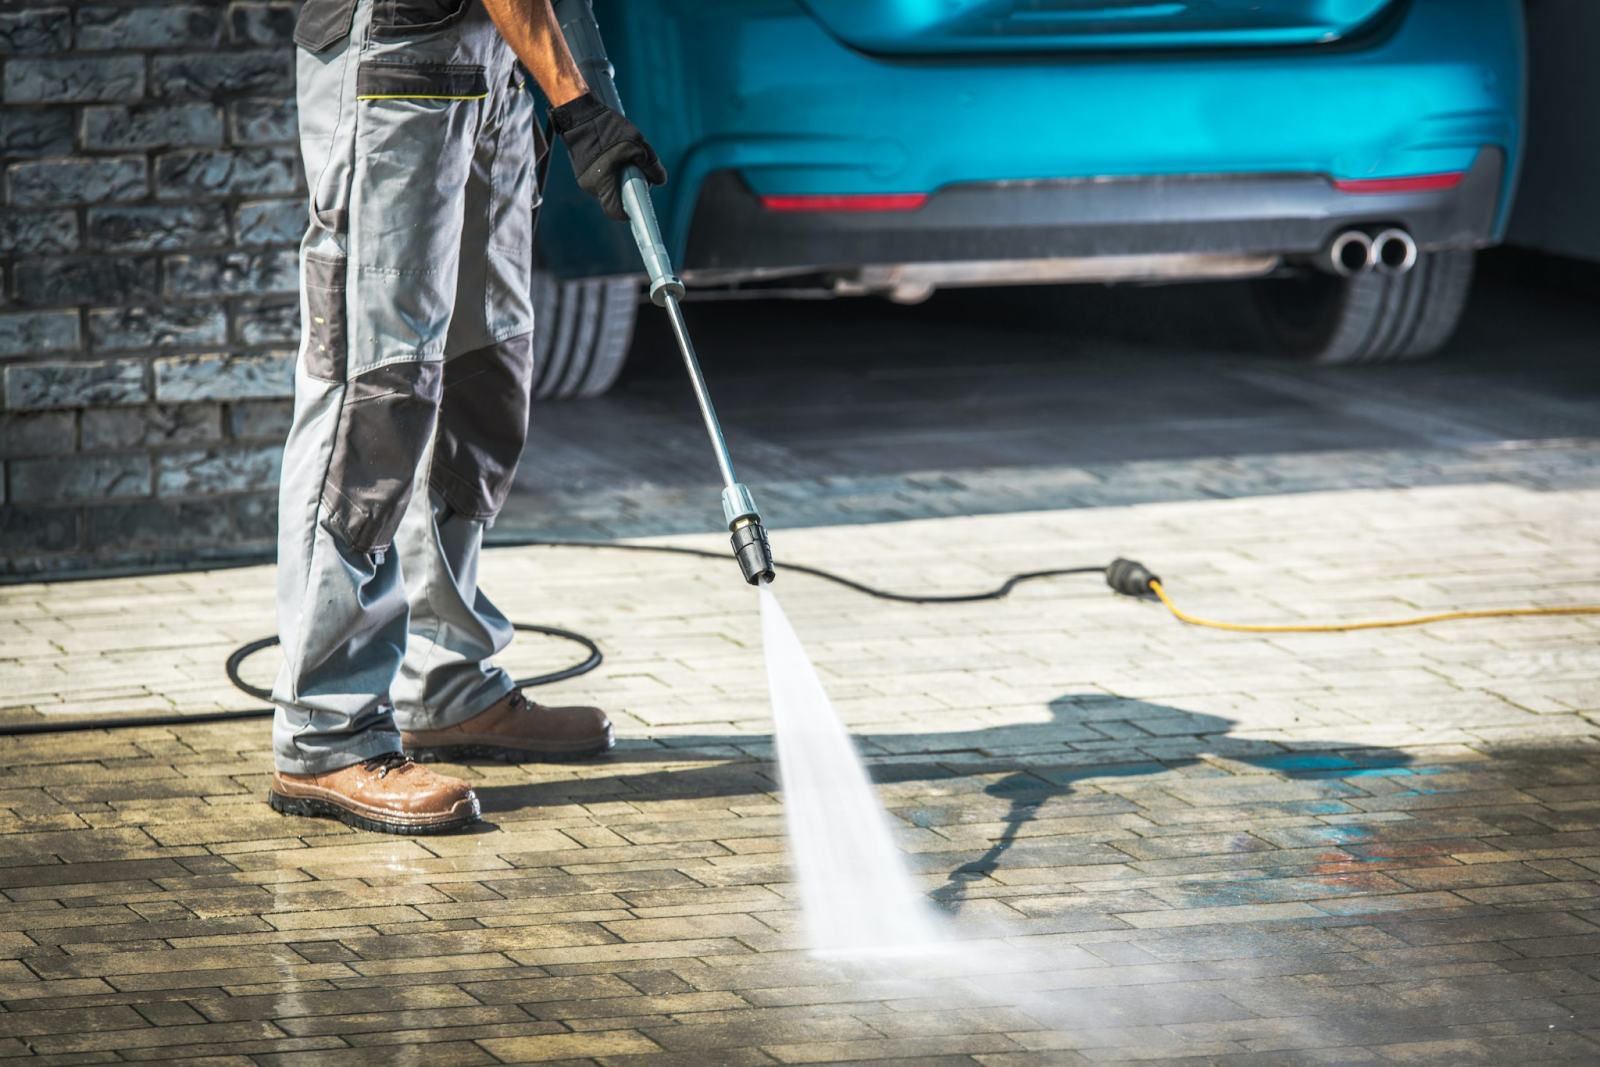
Power Washing Your Patio Like a Pro: Mastering the Technique
Now that you’re prepped and ready, let’s get down to business! Here are some key points to remember for effective and safe pressure washing:
Choosing the Right Cleaning Technique Based on Your Patio Material:
Different materials require different cleaning approaches. Here’s a quick guide:
- Concrete Champions: Concrete patios are generally the most forgiving when it comes to pressure washing. You can use standard power washing techniques for concrete patios. Just remember, to adjust the pressure if needed. Start with a lower pressure setting and gradually increase it if necessary to remove stubborn grime. Safety Tip: Avoid using the highest pressure setting on concrete, as it can damage the surface.
- Stone and Brick Buddies: Stone and brick patios require a gentler touch. These delicate surfaces can be easily chipped or damaged by high pressure. Opt for a lower pressure setting and a wider spray pattern to avoid causing harm. If you’re unsure about the pressure level, it’s always better to err on the side of caution and start with a lower setting.
- Wood Wonderlands: Wood patios need a particularly gentle touch. Unlike concrete or stone, wood can be easily damaged by high pressure. Use a wood-safe detergent specifically formulated for pressure washing, and opt for a lower-pressure setting. A wider spray pattern is also recommended for wood surfaces.
Essential Cleaning Steps (General Guidelines):
Here are some general cleaning steps to follow, regardless of your patio material:
- Work Your Way Up: Start cleaning from the bottom of your patio and work your way up in sections. This prevents dirty runoff from staining the already cleaned areas. Think of it like washing a car – you wouldn’t start at the top and let the dirty suds drip down onto the clean parts, would you?
- Nozzle Know-How: Use the right nozzle for the job! As mentioned earlier, a wide spray tackles large areas quickly, while a narrow one targets specific stains or reaches into tight corners. Always choose the right tools for outdoor maintenance.
- Rinse Well: After you’ve blasted away the grime, give your patio a thorough rinse to remove any leftover soap residue. Remember, soap residue can attract dirt, so rinsing thoroughly is key. Imagine your patio taking a refreshing shower after a long, dirty day!
Advanced Power Washing Techniques (For Experienced DIYers Only):
Feeling confident after tackling the basics? Here are some advanced techniques for experienced DIYers who want to conquer even tougher jobs:
Degreasing Stains
Stubborn oil and grease stains are no match for a degreasing solution specifically formulated for pressure washing. However, be sure to follow the instructions on the product carefully. Degreasers can be harsh chemicals, so wear proper gloves and eye protection when using them. Also, test the degreaser on a small inconspicuous area of your patio first to ensure it doesn’t cause any discoloration.
Mold and Mildew Mayhem (Use With Extreme Caution)
Mold and mildew can be unsightly and even pose health risks. Bleach can be effective against these unwelcome guests, but use it with extreme caution! Wear proper personal protective equipment (PPE) like gloves, goggles, and a respirator. Work in a well-ventilated area, and avoid contact with plants or surrounding surfaces. Bleach can be harmful to vegetation and can discolor some materials. Remember, safety always comes first!
Maintaining Your Power Washer and Keeping Your Patio Clean: A Long-Term Strategy
Post-Cleaning Power Washer Maintenance:
Taking care of your pressure washer after you’re done cleaning ensures it’s in tip-top shape for future battles against grime. Here’s what you should do:
- Drain the Crew: After you’re done power washing, drain the water from the pump, pressure washer hose, and any other hoses attached to your machine. This helps prevent damage from freezing temperatures (if applicable to your climate) and keeps things running smoothly. Consult your pressure washer’s manual for specific instructions on draining.
- Clean Up Your Attachments: Nozzles and pressure washer attachments can get clogged with debris during cleaning. Take a few minutes to clean them out with water to avoid problems next time. You can use a small brush or compressed air to remove any stubborn dirt particles.
- Store it Right: Whether you have a gas-powered or electric pressure washer, store it properly following the manufacturer’s instructions. Gas-powered models might require additional steps like draining the fuel or adding a fuel stabilizer. Electric pressure washers should be stored in a cool, dry place. Remember, proper storage extends the life of your pressure washer and keeps it ready for your next cleaning adventure.
Long-Term Patio Maintenance Tips: Keeping Your Oasis Sparkling
Now that your patio is clean and refreshed, here are some tips to keep it looking its best:
- Be a Spill Fighter: Address spills and stains promptly to prevent them from setting in. The quicker you act, the easier they are to clean. For example, blot up any food or drink spills immediately with a clean cloth.
- Power Up Regularly: For best results, pressure wash your patio once or twice a year. Think of it as a regular spa treatment for your exterior space! Regular cleaning helps prevent dirt and grime buildup, making future power washing sessions less labor-intensive.
- Protect Your Patio: Seal your patio with a sealant specifically designed for your patio material (concrete, stone, brick, etc.) Sealing helps protect the surface from the elements, including rain, snow, and UV rays. This can help prevent staining and make cleaning easier in the long run. You can also use covers for furniture or grills when not in use to minimize dirt buildup.
Beyond Power Washing: Additional Cleaning Options and When to Call a Professional
Eco-Friendly Cleaning Solutions:
For lighter cleaning jobs or if you prefer a more natural approach, consider eco-friendly cleaning solutions. Here are a few options:
- Vinegar Power: For everyday cleaning or tackling milder mildew problems, a solution of white vinegar and water can be effective. Mix equal parts white vinegar and water in a spray bottle and apply it to the affected area. Let it sit for a few minutes, then scrub with a stiff brush and rinse thoroughly.
- Baking Soda Blast: Baking soda is another natural cleaning powerhouse. For stubborn dirt or grime, create a paste of baking soda and water. Apply the paste to the affected area, let it sit for 15-20 minutes, then scrub with a brush and rinse thoroughly.
- Biodegradable Detergents: Several biodegradable detergents are specifically formulated for cleaning patios. These can be a good option for those who want a more powerful clean than vinegar or baking soda but still prefer an eco-friendly approach. Always follow the manufacturer’s instructions for dilution and application.
When to Hire a Professional:
While pressure washing is a powerful tool, it’s not always the answer. Here are some situations where calling in a professional might be a good idea:
- Big Jobs, Big Challenges: For large or complex cleaning jobs, such as patios on multi-story buildings or heavily stained surfaces, a professional pressure washer can save you time and effort. They have the experience and equipment to tackle these challenging tasks efficiently and safely.
- Hard-to-Reach Heroes: If your patio has multiple stories or hard-to-reach areas, like high ceilings or gutters, a professional with the right equipment and safety gear can handle the job safely and effectively. Trying to reach these areas yourself could be dangerous.
- Lack of Confidence, No Problem: Don’t feel comfortable wielding a pressure washer? Hiring a professional ensures your patio gets a deep clean without any risks. They can also advise you on the best cleaning methods and products for your specific patio material.
Conclusion: Enjoy Your Refreshed Patio Oasis!
With a little planning, some elbow grease (or the help of a professional!), and the magic of pressure washing, you can transform your patio into a sparkling oasis ready for entertaining, relaxing, or simply enjoying the outdoors. So fire up the grill, string up the lights, and create lasting memories in your beautiful, refreshed patio space!
FAQs
Q: Is pressure washing right for my patio?
A: Pressure washing is a great option for most patios made of concrete, stone, or brick. However, it’s not suitable for wood patios or delicate surfaces.
Q: What safety precautions should I take when pressure washing?
A: Wear goggles, gloves, sturdy shoes, and long pants. Inspect your pressure washer for leaks, secure the cleaning area, and never point the spray gun at electrical components.
Q: Gas-powered or electric pressure washer?
A: Gas-powered models are powerful for large or heavily soiled patios, but noisier and heavier. Electric ones are quieter and easier to use, ideal for smaller patios or noise-sensitive areas.
Q: What cleaning solutions can I use with a pressure washer?
A: Use power-boosting detergents specifically formulated for pressure washing and safe for your patio material. Avoid harsh chemicals like bleach unless necessary, and always follow safety instructions.
Q: How often should I pressure wash my patio?
A: Ideally, once or twice a year to prevent dirt and grime buildup. Address spills and stains promptly to avoid them setting in.
Q: Can I clean my patio without a pressure washer?
A: Yes, for lighter cleaning, eco-friendly options like vinegar, baking soda, or biodegradable detergents can be effective.
Q: When should I call a professional pressure washer?
A: Consider hiring a pro for large or complex jobs, hard-to-reach areas, or if you lack the confidence or experience to handle the job safely.
-

 News3 months ago
What Are the Biggest Challenges in Marine Construction Projects in Australia?
-

 Health4 months ago
Understanding Ftmç: Gender-Affirming Surgery
-

 Fashion3 months ago
Attractive Beach Dresses: Elevate Your Look with These Ideas
-

 Tech3 months ago
Aiyifan: Unveiling the Genie of Technological Revolution
-

 Business3 months ago
How Professional Concrete Cleaning Wins Repeat Business
-

 Tech4 months ago
The Ultimate Guide to the Geekzilla Podcast: Diving into the Heart of Geekdom
-

 Pets2 months ago
Pawsitively Perfect: The Types of Dog Harness Bundle for Your Furry Friend
-

 Health3 months ago
Desk Job Dilemma: Tips for Back Pain Relief