
Home Improvement
Patio Power-Up: Refresh Your Outdoor Space with Pressure Washing
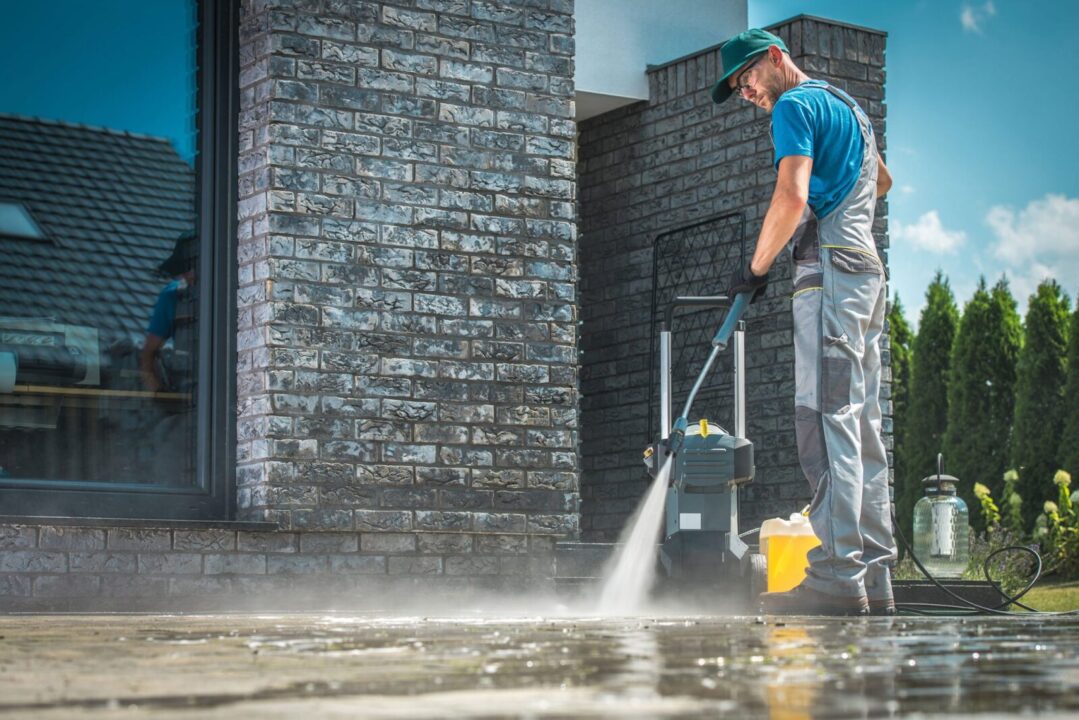
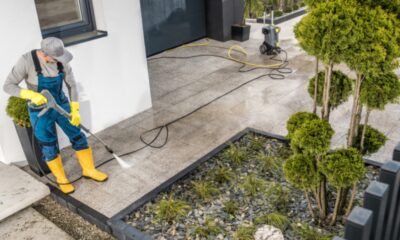
Is your once-glistening patio looking a little worse for wear? Winter’s icy grip left behind a layer of grime, or perhaps those summer barbecues have taken their toll. Fear not, fellow patio owner! Breathe new life into your outdoor space with the magic of pressure washing.
This powerful tool can be your secret weapon against dirt, mold, and grime, transforming your patio from a neglected corner into a sparkling oasis ready for entertaining. But before you unleash the cleaning power, let’s navigate the world of pressure washing and ensure you tackle the job safely and effectively.
Why Pressure Wash Your Patio?
Think of pressure washing as a spa treatment for your patio. Here are some reasons why it might be the perfect pick-me-up for your outdoor space:
Reclaim Your Patio Paradise
Over time, patios accumulate layers of dirt, mold, mildew, and algae. These unwelcome guests not only make your patio look dull but can also create a slippery hazard zone. Pressure washing blasts them away, revealing the original beauty of your concrete, stone, brick, or even wood patio.
Safety First
Slippery moss and algae are like tiny, green landmines waiting to spring a surprise on unsuspecting guests. Pressure washing removes these dangers, creating a safer space for you, your family, and your friends to enjoy.
Get Ready to Party!
Is your patio ready for summer entertaining? Pressure washing removes accumulated dirt, food spills, and grime, making your patio more inviting for barbecues, pool parties, or simply relaxing evenings under the stars.
Increase Curb Appeal
A clean and well-maintained patio can significantly enhance the curb appeal of your entire property. Think of it as putting your best foot forward – or in this case, your best patio forward!
Getting Ready for Patio Power Washing: Safety First!
Before you unleash the cleaning power, let’s make sure you’re prepped and safe. Here are some important measures to follow:
- Gear Up for Battle: Dress for the occasion! Goggles, gloves, sturdy shoes, and long pants are your essential pressure washing armor. Protecting your eyes from flying debris is crucial, and gloves will shield your hands from the cleaning solution and the pressure of the water spray.
- Inspect Your Arsenal: Don’t underestimate the importance of a pre-battle inspection! Check your pressure washer and hose for any leaks or damage. A surprise leak in the middle of cleaning is not the kind of adventure you want.
- Secure the Area: Think of your patio furniture, decorations, and precious plants as innocent bystanders in this cleaning war. Move them out of harm’s way, or cover them with drop cloths to protect them from the water spray.
- Master the Trigger: Hold the trigger at a safe distance and avoid spraying electrical components. Remember, power comes with responsibility – the responsibility to avoid electrical hazards! Consult your pressure washer’s manual for proper operating instructions.
Choosing the Right Tools and Supplies: Assemble Your Cleaning Crew!
Now it’s time to gather your cleaning crew, the essential tools and supplies you’ll need to tackle the job:
Gas vs. Electric?
Pressure washers come in two types: gas-powered and electric. Gas-powered ones are powerhouses, ideal for large or heavily soiled patios. However, they can be heavier and noisier to operate. Electric pressure washers are quieter and easier to maneuver, making them a good choice for smaller patios or for those who prioritize noise control. Consider the size of your patio, your comfort level, and your budget when making your decision.
Nozzle Know-How
Different nozzles create different spray patterns. A wide spray is great for covering large areas quickly, while a narrow one tackles stubborn stains or reaches into tight corners. Having a variety of nozzles on hand allows you to adjust your cleaning approach based on the task at hand.
Power Up Your Clean
For stubborn grime or heavily stained patios, consider using a power-boosting detergent specifically formulated for pressure washing. These detergents can help break down tough dirt and grime, making cleaning more efficient. Important Note: Always choose a detergent that’s safe for your specific patio material (concrete, stone, brick, etc.)
Accessories for Success:
Extension wands are lifesavers for reaching high areas on multi-story patios or cleaning gutters. Drop cloths, as mentioned earlier, become your shields against accidental overspray on surrounding surfaces. Don’t forget to choose a power washer hose with the right length and pressure rating for your machine. A mismatch can lead to leaks or reduced cleaning power.
Prepping Your Patio for Cleaning: Getting Stage Ready

Now that you’ve assembled your cleaning crew and prepped for safety, it’s time to get your patio ready for its close-up (or in this case, its power-washing close-up). Here’s how:
- Clear the Zone: Remove furniture, decorations, and any potted plants that might get caught in the cleaning crossfire. Remember, even the most well-behaved pressure washer can unleash a surprising amount of water.
- Test It Out: Find a hidden spot on your patio, preferably a corner or a small section along the edge. Do a test run with the pressure washer on this inconspicuous area. This helps you check the cleaning power and spray pattern of your chosen nozzle before tackling the entire patio. Adjust the pressure or nozzle if needed to achieve the desired results.
- Dampen Up (Optional): For some materials like concrete, dampening the surface before power washing can make cleaning more efficient. Think of it like softening the dirt before scrubbing. However, dampening isn’t always necessary, especially for materials like stone or brick. Consult your pressure washer manual or research online to see if dampening is recommended for your specific patio material.
Power Washing Your Patio Like a Pro: Mastering the Technique
Now that you’re prepped and ready, let’s get down to business! Here are some key points to remember for effective and safe pressure washing:
Choosing the Right Cleaning Technique Based on Your Patio Material:
Different materials require different cleaning approaches. Here’s a quick guide:
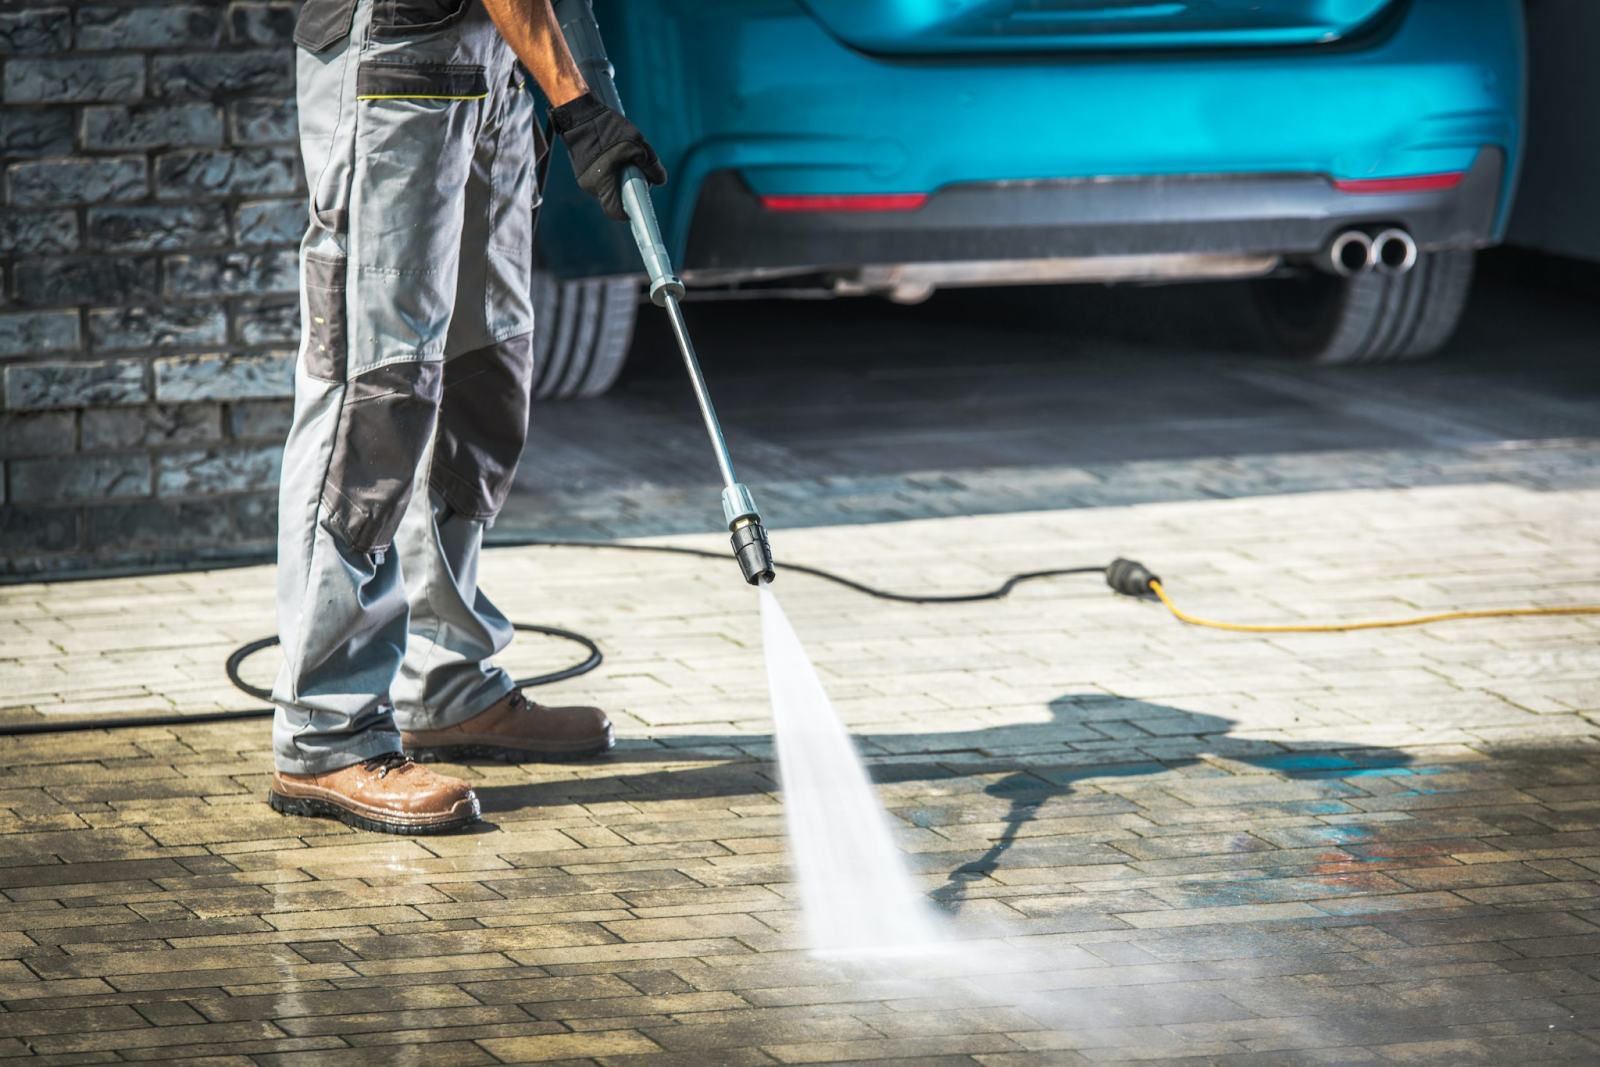
- Concrete Champions: Concrete patios are generally the most forgiving when it comes to pressure washing. You can use standard power washing techniques for concrete patios. Just remember, to adjust the pressure if needed. Start with a lower pressure setting and gradually increase it if necessary to remove stubborn grime. Safety Tip: Avoid using the highest pressure setting on concrete, as it can damage the surface.
- Stone and Brick Buddies: Stone and brick patios require a gentler touch. These delicate surfaces can be easily chipped or damaged by high pressure. Opt for a lower pressure setting and a wider spray pattern to avoid causing harm. If you’re unsure about the pressure level, it’s always better to err on the side of caution and start with a lower setting.
- Wood Wonderlands: Wood patios need a particularly gentle touch. Unlike concrete or stone, wood can be easily damaged by high pressure. Use a wood-safe detergent specifically formulated for pressure washing, and opt for a lower-pressure setting. A wider spray pattern is also recommended for wood surfaces.
Essential Cleaning Steps (General Guidelines):
Here are some general cleaning steps to follow, regardless of your patio material:
- Work Your Way Up: Start cleaning from the bottom of your patio and work your way up in sections. This prevents dirty runoff from staining the already cleaned areas. Think of it like washing a car – you wouldn’t start at the top and let the dirty suds drip down onto the clean parts, would you?
- Nozzle Know-How: Use the right nozzle for the job! As mentioned earlier, a wide spray tackles large areas quickly, while a narrow one targets specific stains or reaches into tight corners. Always choose the right tools for outdoor maintenance.
- Rinse Well: After you’ve blasted away the grime, give your patio a thorough rinse to remove any leftover soap residue. Remember, soap residue can attract dirt, so rinsing thoroughly is key. Imagine your patio taking a refreshing shower after a long, dirty day!
Advanced Power Washing Techniques (For Experienced DIYers Only):
Feeling confident after tackling the basics? Here are some advanced techniques for experienced DIYers who want to conquer even tougher jobs:
Degreasing Stains
Stubborn oil and grease stains are no match for a degreasing solution specifically formulated for pressure washing. However, be sure to follow the instructions on the product carefully. Degreasers can be harsh chemicals, so wear proper gloves and eye protection when using them. Also, test the degreaser on a small inconspicuous area of your patio first to ensure it doesn’t cause any discoloration.
Mold and Mildew Mayhem (Use With Extreme Caution)
Mold and mildew can be unsightly and even pose health risks. Bleach can be effective against these unwelcome guests, but use it with extreme caution! Wear proper personal protective equipment (PPE) like gloves, goggles, and a respirator. Work in a well-ventilated area, and avoid contact with plants or surrounding surfaces. Bleach can be harmful to vegetation and can discolor some materials. Remember, safety always comes first!
Maintaining Your Power Washer and Keeping Your Patio Clean: A Long-Term Strategy
Post-Cleaning Power Washer Maintenance:
Taking care of your pressure washer after you’re done cleaning ensures it’s in tip-top shape for future battles against grime. Here’s what you should do:
- Drain the Crew: After you’re done power washing, drain the water from the pump, pressure washer hose, and any other hoses attached to your machine. This helps prevent damage from freezing temperatures (if applicable to your climate) and keeps things running smoothly. Consult your pressure washer’s manual for specific instructions on draining.
- Clean Up Your Attachments: Nozzles and pressure washer attachments can get clogged with debris during cleaning. Take a few minutes to clean them out with water to avoid problems next time. You can use a small brush or compressed air to remove any stubborn dirt particles.
- Store it Right: Whether you have a gas-powered or electric pressure washer, store it properly following the manufacturer’s instructions. Gas-powered models might require additional steps like draining the fuel or adding a fuel stabilizer. Electric pressure washers should be stored in a cool, dry place. Remember, proper storage extends the life of your pressure washer and keeps it ready for your next cleaning adventure.
Long-Term Patio Maintenance Tips: Keeping Your Oasis Sparkling
Now that your patio is clean and refreshed, here are some tips to keep it looking its best:
- Be a Spill Fighter: Address spills and stains promptly to prevent them from setting in. The quicker you act, the easier they are to clean. For example, blot up any food or drink spills immediately with a clean cloth.
- Power Up Regularly: For best results, pressure wash your patio once or twice a year. Think of it as a regular spa treatment for your exterior space! Regular cleaning helps prevent dirt and grime buildup, making future power washing sessions less labor-intensive.
- Protect Your Patio: Seal your patio with a sealant specifically designed for your patio material (concrete, stone, brick, etc.) Sealing helps protect the surface from the elements, including rain, snow, and UV rays. This can help prevent staining and make cleaning easier in the long run. You can also use covers for furniture or grills when not in use to minimize dirt buildup.
Beyond Power Washing: Additional Cleaning Options and When to Call a Professional
Eco-Friendly Cleaning Solutions:
For lighter cleaning jobs or if you prefer a more natural approach, consider eco-friendly cleaning solutions. Here are a few options:
- Vinegar Power: For everyday cleaning or tackling milder mildew problems, a solution of white vinegar and water can be effective. Mix equal parts white vinegar and water in a spray bottle and apply it to the affected area. Let it sit for a few minutes, then scrub with a stiff brush and rinse thoroughly.
- Baking Soda Blast: Baking soda is another natural cleaning powerhouse. For stubborn dirt or grime, create a paste of baking soda and water. Apply the paste to the affected area, let it sit for 15-20 minutes, then scrub with a brush and rinse thoroughly.
- Biodegradable Detergents: Several biodegradable detergents are specifically formulated for cleaning patios. These can be a good option for those who want a more powerful clean than vinegar or baking soda but still prefer an eco-friendly approach. Always follow the manufacturer’s instructions for dilution and application.
When to Hire a Professional:
While pressure washing is a powerful tool, it’s not always the answer. Here are some situations where calling in a professional might be a good idea:
- Big Jobs, Big Challenges: For large or complex cleaning jobs, such as patios on multi-story buildings or heavily stained surfaces, a professional pressure washer can save you time and effort. They have the experience and equipment to tackle these challenging tasks efficiently and safely.
- Hard-to-Reach Heroes: If your patio has multiple stories or hard-to-reach areas, like high ceilings or gutters, a professional with the right equipment and safety gear can handle the job safely and effectively. Trying to reach these areas yourself could be dangerous.
- Lack of Confidence, No Problem: Don’t feel comfortable wielding a pressure washer? Hiring a professional ensures your patio gets a deep clean without any risks. They can also advise you on the best cleaning methods and products for your specific patio material.
Conclusion: Enjoy Your Refreshed Patio Oasis!
With a little planning, some elbow grease (or the help of a professional!), and the magic of pressure washing, you can transform your patio into a sparkling oasis ready for entertaining, relaxing, or simply enjoying the outdoors. So fire up the grill, string up the lights, and create lasting memories in your beautiful, refreshed patio space!
FAQs
Q: Is pressure washing right for my patio?
A: Pressure washing is a great option for most patios made of concrete, stone, or brick. However, it’s not suitable for wood patios or delicate surfaces.
Q: What safety precautions should I take when pressure washing?
A: Wear goggles, gloves, sturdy shoes, and long pants. Inspect your pressure washer for leaks, secure the cleaning area, and never point the spray gun at electrical components.
Q: Gas-powered or electric pressure washer?
A: Gas-powered models are powerful for large or heavily soiled patios, but noisier and heavier. Electric ones are quieter and easier to use, ideal for smaller patios or noise-sensitive areas.
Q: What cleaning solutions can I use with a pressure washer?
A: Use power-boosting detergents specifically formulated for pressure washing and safe for your patio material. Avoid harsh chemicals like bleach unless necessary, and always follow safety instructions.
Q: How often should I pressure wash my patio?
A: Ideally, once or twice a year to prevent dirt and grime buildup. Address spills and stains promptly to avoid them setting in.
Q: Can I clean my patio without a pressure washer?
A: Yes, for lighter cleaning, eco-friendly options like vinegar, baking soda, or biodegradable detergents can be effective.
Q: When should I call a professional pressure washer?
A: Consider hiring a pro for large or complex jobs, hard-to-reach areas, or if you lack the confidence or experience to handle the job safely.

All dream of a beautiful yard that will add value to the homes and become an oasis in which you can relax outdoors. Landscaping will feel like an expensive project. With plants, equipment, and a helping hand from the pros, it can soon become expensive. By using a little creativity and thinking outside the box, it is doable to landscape on a budget. That is why this article gives you a list of ideas or tips for making the exterior of your house going to be comfortable and beautiful without having to spend a lot.
Plan Before You Start
When designing landscapes, planning is the first process. Sort out your yard and figure it onto a paper as well as which landscape design locations you would like design. A well-defined idea of what you want to achieve will prevent you from making purchases that are useless and keep your efforts focused. Take measurements of the space you are working with and create a materials or plant list this plan will be used as your roadmap during the process.
Use What You Have
Take note of what you have before purchasing new plants or materials. Incorporate existing trees, shrubs, or rocks into your landscaping Melbourne design. You can save a lot of money by re-using old bricks or stones to make garden borders, ads, or walkways. You may also upcycle items such as old tubs, barrels, or even tires to make original planters for flowers and vegetables.
DIY Landscaping Projects
Employing a professional landscaper also can be quite expensive, but there are many projects that you could do yourself. You can build a garden bed, lay down a simple stone path, or plant a tree with only some basic tools and time. If you are unsure where to start in the realm of gardening but want to attempt your hand at horticulture at a later time, it usually is advisable to participate in DIY style and design. DIY not only saves money but allows you to customize your yard.
Use Gravel for Pathways
Gravel is an inexpensive way to add pathways to your yard. It is far cheaper than stone or concrete and simple to lay. The gravel path offers smooth scalloped edges and deep texture, a shaded route through the landscape. You could even stone or brick out the paths to make them look neat.
Build a Simple Deck or Patio
You can landscaping Melbourne with a simple deck or patio can be a good area for outdoor dining or relaxation. Expensive materials, such as concrete pavers or even salvaged wood are not required. Because it does not have to be completed all in one go, this DIY project allows you to save up for the materials over time and will leave you with a space that is effective and great looking.
Install Solar Lighting
Outdoor lighting does not have to be overpriced. If you have a yard and want to see your way somehow, solar lights are the best value-for-money lighting you can use that also helps reduce waste. Solar lights are available in many retail outlets, some of which do not even have to be wired up at all. Line your pathways with them or set them around flower beds and patios to add a warm glow in the evening.
Vertical Gardens Add Height
Ideal for those working with limited space or hoping to get creative with how they present their plants. Plant climbing plants like vines, beans, or cucumbers for use with a trellis, fence, or wall. Living walls and vertical gardens are an inexpensive way to get a burst of green without losing the floor space. Additionally, they add more depth and color to your yard.
Gardening on a Budget doesn’t mean that satisfying with the less attractiveness and style. Budget-friendly ideas will create a beautiful and relaxing outdoor space that you can enjoy for years.
Handling electrical work is one of the most important jobs in the project, when building a new home or remodeling an existing one. To ensure that the services you obtain meet your needs and your expectations perfectly, the first step in achieving your goals is to choose reputable and experienced electricians such as electricians in Wollongong. These service providers are contractors who provide quality electrical services to meet your demands. They understand their jobs and are skilled in properly installing wires and electrical systems. Read below to learn some of the reasons why you need to hire these service providers.
- Safety
It is essential to have the best people who know how things are done and translate that into high-quality work and trusted results. Ask friends for recommended electricians who bring them satisfaction and safety. Get only licensed companies with the best customer references and positive feedback. When meeting or inviting electricians to your place, ask them questions about their practices and insurance, whether they provide guarantees, request cost estimates, and consult on any queries that concern you before engaging any employee or labor for your project.
- Ensuring Compliance with Electrical Codes
Complying with the Electrical Codes is vital because it helps avoid accidents due to electrical hazards. These codes outline the construction requirements that result in ultimate safety. Every home or commercial property owner desires to save on electricity. Utilizing the expertise of a trained, experienced electrician can assist in lessening electricity bills, increasing savings, and the value of your property. It is not only for electrical emergencies; hiring an electrician ensures that your property is well protected, saves on utility costs, and is better connected.
- Efficient Troubleshooting and repairs
A skillful and experienced individual can pinpoint those issues and address them properly. Professional electricians possess the knowledge to detect problems faster. Moreover, they will provide real solutions rather than producing temporary fixes that may cause you to spend again in no time. Electricians can ensure you are in great hands with whatever work you require involving your electrical system. Unreachable repair work can be dangerous, and hiring an electrician is a must because they ensure your safety and provide installations according to the required standards. The electrician you hire will utilize functions developed to keep your electrical system safe, such as circuit breakers and regular safety checks.
- Ensuring Insurance Coverage
Ensure that the electrician you are hiring has proper insurance for their work. There are several ways uninsured electricians might make a mess, and you do not want any responsibility. You will be held financially responsible if the electrician is hurt while working on your property and your insurance policy does not cover them. Suppose the electrician makes a mistake during installation and your property sustains damage. In that case, you want an insurance plan to ensure you are covered, and the repairs will be taken care of through that insurance policy. Before hiring any electrician, have them provide a copy of their insurance coverage so you can review it and ensure it is current and offers full protection for all eventualities.
- Reliability
Electricity is very hazardous and could prove fatal if improperly handled or installed. One must know and understand what they are doing when dealing with it. The daily rate of electrocution accidents could have been avoided had they decided to get professional help. Hiring a professional to do the work could also save the person from long hours of being without electricity or longer hours of functional electricity while the work is being done.
Always hire a legitimate and trustworthy electrician like electricians in Wollongong. Ask friends and family members for recommendations, and always check for guarantees, credentials, and insurance. The electrician you hire must have a certificate, be registered and certified in the industry, and be monitored to ensure compliance with job regulations and standards. Look for experience identifying and solving electrical problems and a reputation for quality work. Select an electrician with experience in the specific work you want to do. These are the reasons why you need an experienced electrician.
Moving can be a stressful experience, but one thing that can make the process smoother is ensuring that your new or old home is thoroughly cleaned. Move-in and move-out cleaning services are designed to tackle the tough tasks that often get overlooked during a busy relocation. Whether you’re preparing for new tenants or making your new house feel like home, this checklist will help you identify the key areas that need attention.
1. Kitchen Cleaning Essentials
- Cabinets and Drawers: Empty and wipe down all cabinets and drawers inside and out. Remove any crumbs or residues left behind.
- Appliances: Clean the inside of the oven, refrigerator, microwave, and dishwasher. Pay extra attention to the stove top and exhaust fans.
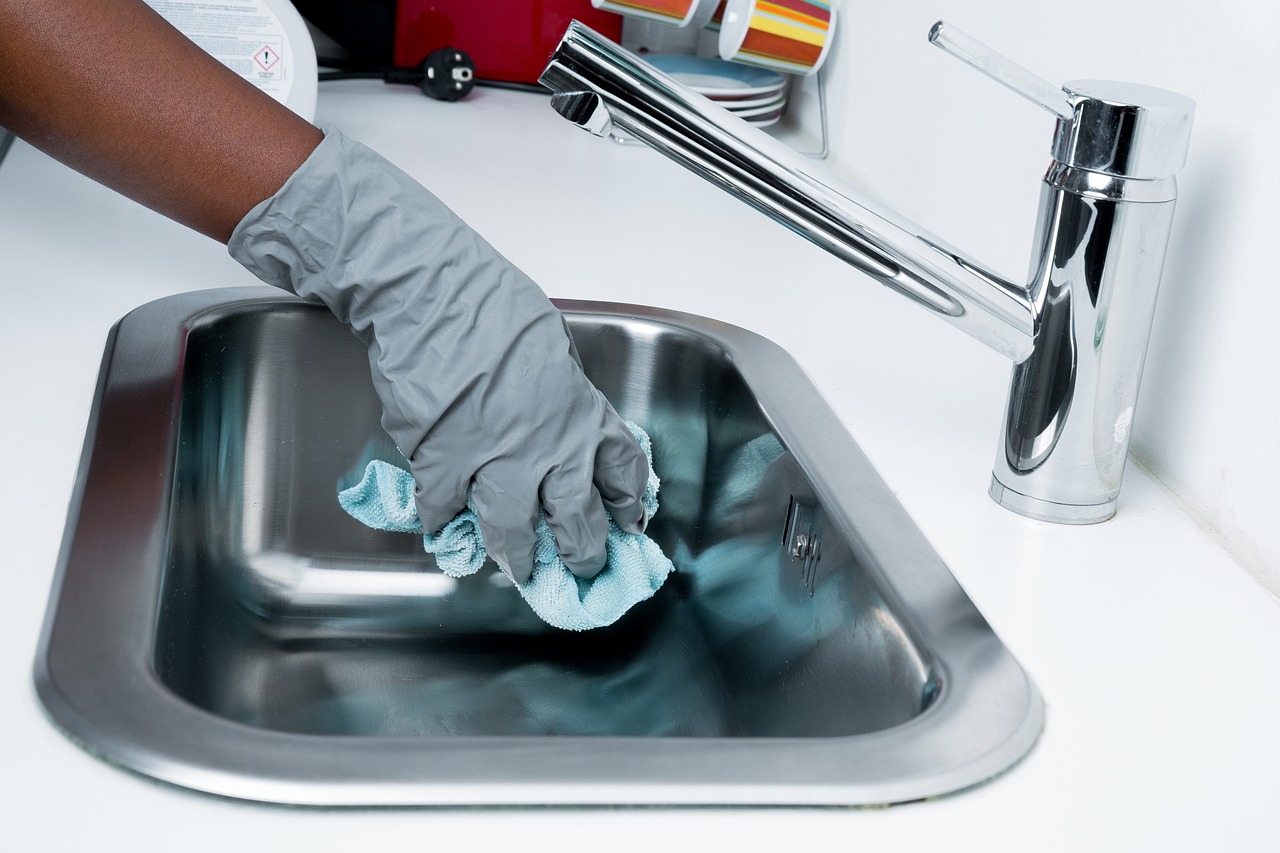
- Sinks and Countertops: Scrub the sink, faucets, and countertops to remove stains, limescale, and food particles.
- Floors: Sweep and mop the kitchen floor, ensuring all corners and under appliances are spotless.
2. Bathroom Deep Cleaning
- Toilets, Showers, and Bathtubs: Disinfect and scrub toilets, bathtubs, and shower stalls. Remove any mold, soap scum, and hard water stains.
- Mirrors and Glass: Clean all mirrors and glass surfaces to remove streaks and water spots.
- Tile and Grout: Pay special attention to tile and grout lines; use a grout cleaner to restore whiteness.
- Vanity and Sink: Clean and disinfect the vanity area, including the sink, faucet, and underneath the sink.
3. Living Areas and Bedrooms
- Dusting: Dust all surfaces, including shelves, baseboards, window sills, and ceiling fans.
- Windows: Clean the interior windows and wipe down the frames and tracks.
- Floors: Vacuum carpets and rugs; mop hardwood, tile, or laminate floors thoroughly.
- Closets: Wipe down closet shelves and vacuum closet floors. Make sure all personal items are removed.
4. Special Attention to High-Touch Areas
High-touch areas such as door handles, light switches, and banisters can harbor germs and dirt. Ensure these areas are disinfected to keep your new or old space healthy and clean.
5. Walls and Baseboards
Over time, walls can accumulate marks, dust, and grime. Wipe down walls where possible, especially around switch plates and corners. Don’t forget the baseboards; a quick dusting and wipe can make a big difference.
6. Final Touches
Once all the main cleaning tasks are complete, finish by taking out the trash, replacing air filters, and doing a final walkthrough to ensure everything looks perfect. This final step ensures that the home is ready for the next occupants or to welcome you into your new space.
Final Thoughts
Move-in and move-out cleaning is essential for a fresh start. By following this checklist, you can ensure no area is overlooked, making the transition smoother. For professional move-in and move-out cleaning services, consider reaching out to Cleaning Laboratory. Their expert cleaners will handle all the details, so you can focus on settling in. Learn more about their services at the link and schedule your next cleaning today.
-

 News6 months ago
What Are the Biggest Challenges in Marine Construction Projects in Australia?
-

 Fashion6 months ago
Attractive Beach Dresses: Elevate Your Look with These Ideas
-

 Health7 months ago
Understanding Ftmç: Gender-Affirming Surgery
-

 Pets5 months ago
Pawsitively Perfect: The Types of Dog Harness Bundle for Your Furry Friend
-
 Business6 months ago
How Professional Concrete Cleaning Wins Repeat Business
-

 Entertainment5 months ago
Netnaija: Your One-Stop Shop for Free Movies in Africa
-

 Tech6 months ago
Aiyifan: Unveiling the Genie of Technological Revolution
-

 Health6 months ago
Desk Job Dilemma: Tips for Back Pain Relief